Revit phases let you model a construction sequence inside a single project file. Instead of maintaining separate models for “existing”, “demolition”, and “new construction”, you assign every element a moment of creation and, optionally, a moment of demolition. Revit “tries” to use that information to decide what each view should show.
It is a useful idea, but phases are also one of the most common sources of model errors, and they are not that easy to understand at first. In this post I try to explain in simple terms how they work, in case you join a project where they are already in use and you can’t avoid them.
At the end of the article I share my personal point of view on whether it’s worth using them on a real project.
Part 1: Element phase parameters
Every element has two parameters: Phase Created and Phase Demolished. These two parameters should be filled with the phase in which they were created, phase 1 for instance, and optionally the phase in which they are demolished, phase 3, let’s say.
- These two parameters determine the element’s state relative to a given phase.
- There are four possible states depending on the phase you are in:
- New → Element was created in the phase of the current view.
- Existing → Element was created in an earlier phase and continues to exist in the current phase.
- Demolished → Element was created in an earlier phase and demolished in the current phase.
- Temporary → Element was created and demolished during the current phase.
- The state isn’t fixed, depends on the phase you are currently now. The same element can be “Existing” in Phase 2 and “Demolished” in Phase 3.
Part 2: The view’s phase
- In part one I’ve said that “Revit elements have two parameters: Phase Created and Phase Demolished.” Whereas views have its own Phase parameter, different from those two.
- This parameter sets the time reference Revit uses for that view.
- It’s what determines, for each element, which of the 4 states (New/Existing/Demolished/Temporary) applies in that specific view.
- The same element can show up differently in different views depending on their phase.
- Schedules also require choosing a phase when created, same logic as views, applied to a table instead of a graphic view.
- This view phase is what the Phase Filter (Part 3) actually operates on.
Part 3: Phase filters
I always try to think of Phase Filters with a glasses analogy:
Imagine the building is already finished and it was built in 3 phases without demolitions. You use glasses Number 1 that hides elements built after Phase 1. With glasses Number 2 you can see elements created in Phase 1 and 2, not 3. Does it make sense? With glasses Number 3, you guessed it, you see the finished building.
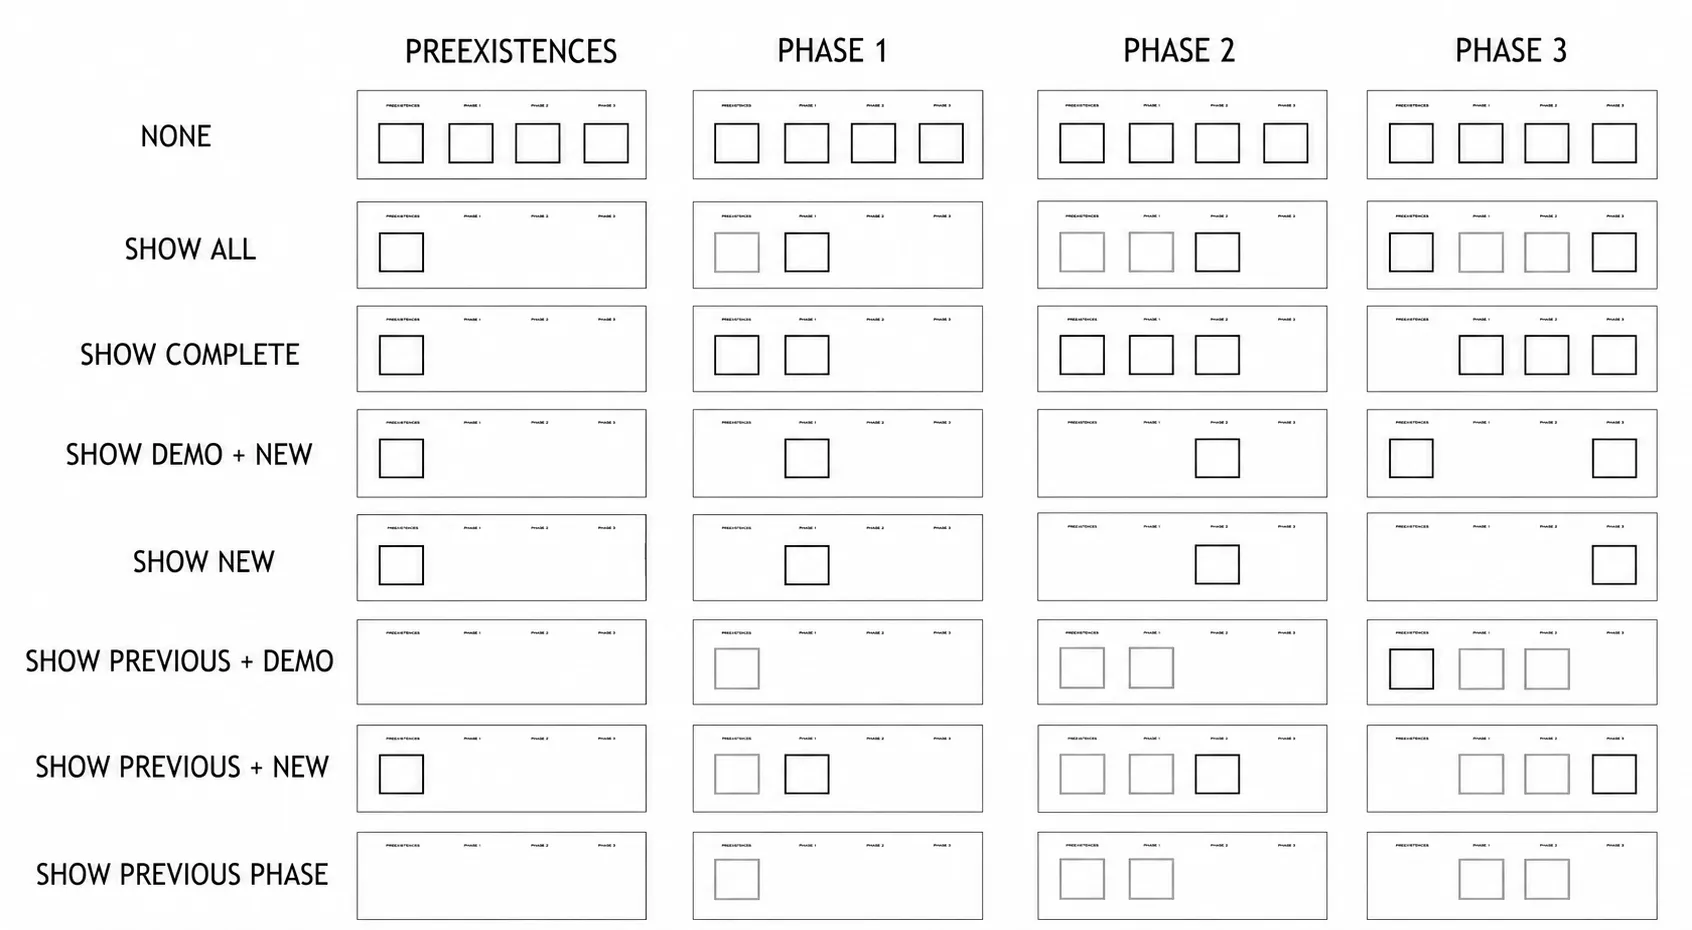
What’s really tricky about Revit is that you don’t have one pair of glasses per phase, you have 7 glasses per phase. A pair that shows all, another that only shows new elements, etc, see below.
- The view’s Phase Filter decides which of the 4 states get shown, and how.
- 8 possible filters (“The 7 glasses per Phase”):
- None → no filter applied, everything shows (You use no glasses here).
- Show All → everything completed up to that phase, demolished included.
- Show Complete → everything completed up to that phase, demolished excluded.
- Show Demo + New → only what’s new in that phase + demolished elements.
- Show New → only what’s new in that phase.
- Show Previous + Demo → elements from the previous phase + demolished elements from previous phases.
- Show Previous + New → elements from the previous phase + new elements in this phase.
- Show Previous Phase → only elements from the previous phase.
- For each of the 4 states, the filter resolves it in one of 3 ways: By Category / Not Displayed / Overrides (You can modify how the “glasses” show elements by those 3 ways). This is the actual mechanism that controls graphic appearance. The filter name only decides which states are included; this setting decides how each one is drawn.
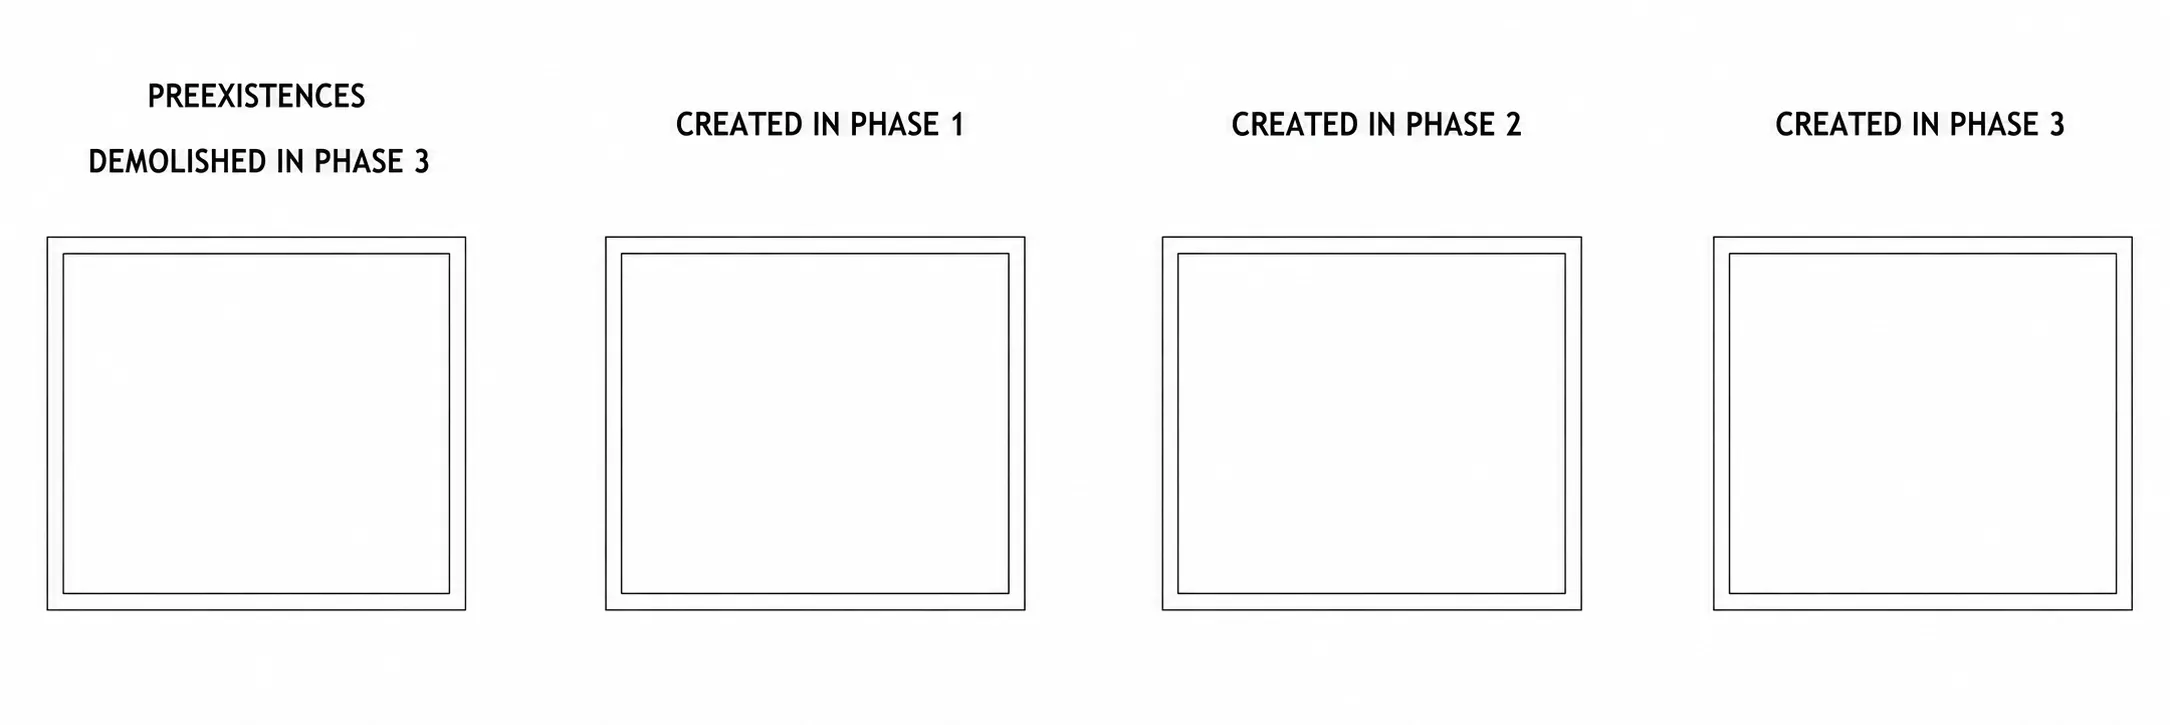
Notes:
- Notice that “Show All” does not show all. You must choose “None” in order to see all.
- If a link doesn’t share the exact same phase names as the host, you need to map them manually (Phase Mapping, in the link’s Type Properties).
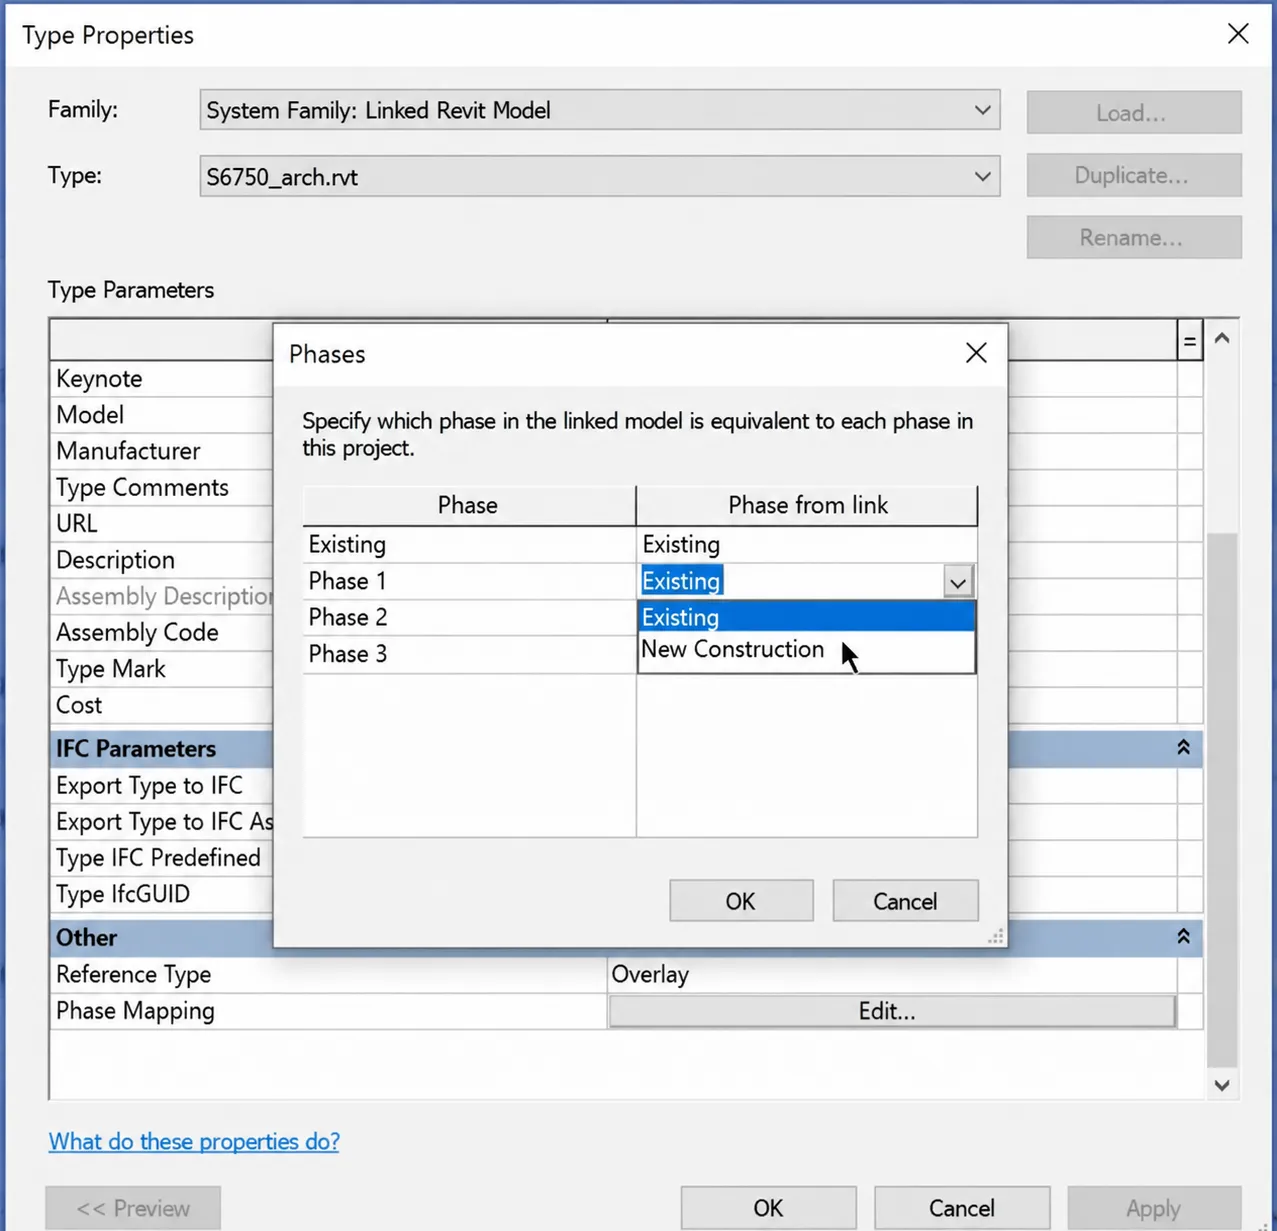
- When you use “By Host View” in Visibility/Graphics for a link, Revit looks for a phase filter in the link with the exact same name as the one active in the host view. If that name doesn’t exist in the link, Revit can’t apply it and falls back to “None” for that link, meaning everything from every phase shows, without warning.
Recap
- Phases give granular control over construction time within a single model.
- But that control only works if every parameter is configured correctly: element, view, filter, and (when relevant) link mapping.
- I avoid phasing on most projects.
- Phases can corrupt models easily and produce errors that are hard to trace in collaborative environments (this has happened to me several times).
- This is especially true with linked models, phase filters only behave correctly when the filter names match exactly across every file, not just the phase names themselves.
- Otherwise Revit silently falls back to “None” → shows everything from every phase. Autodesk’s own documentation confirms a host model’s phase filter does not control linked files when filter names differ.
- Instead, I prefer view templates with
Phase Filter: None+ control through regular view filters, explicit, reproducible, doesn’t depend on each element’s phase state. - For how I handle phases when auditing a model, see the BIM Model Audit Template.