A first look at the Revit API by building a simple addin from scratch. We follow Autodesk’s official tutorial.
1. Prerequisites and Materials
To follow this lesson in practice and replicate the steps shown in the video, you will only need three tools installed:
- Autodesk Revit
- Visual Studio
- Windows Notepad (or any plain text editor)
Downloading the Test Model
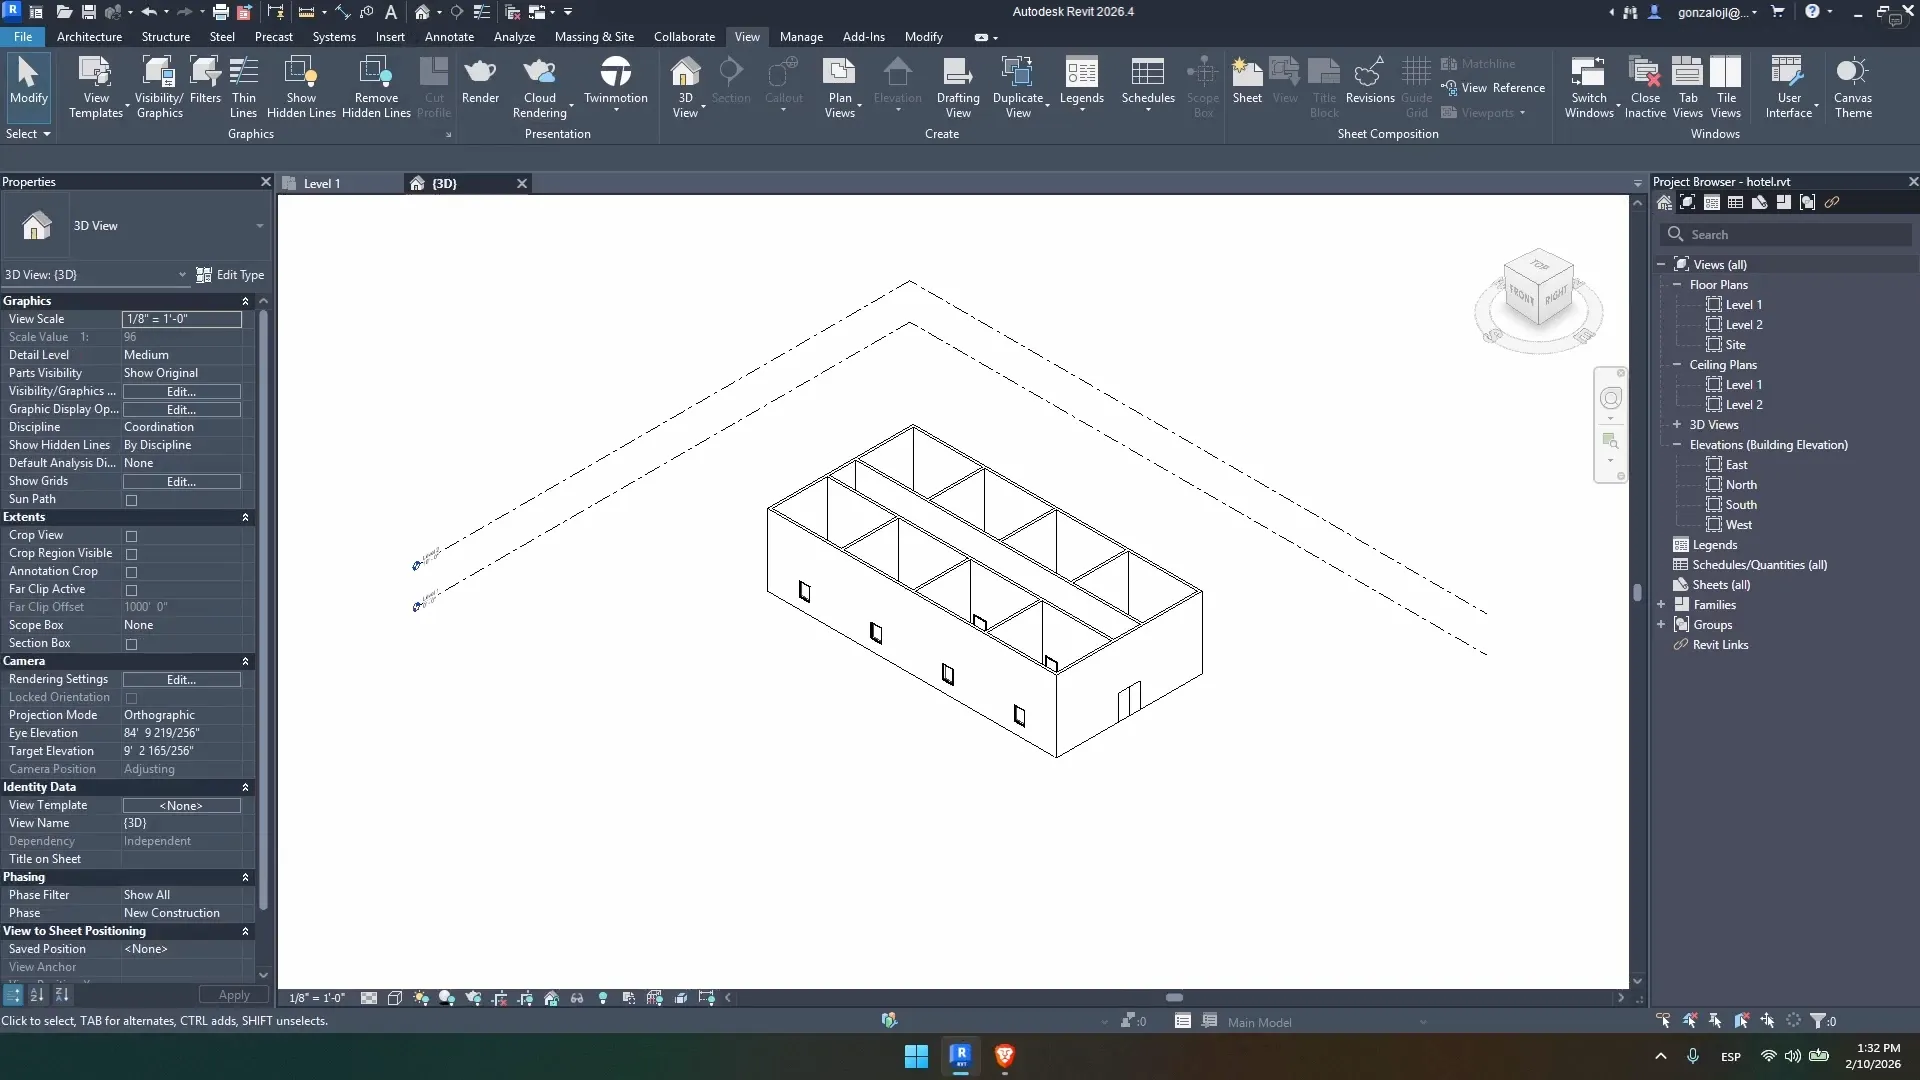
Autodesk’s official documentation provides several files. For this first exercise, we only need the example architectural model: the SampleRevit Project File: Hotel.rvt. When you open it, you’ll see that it is a simple project, ideal for testing. If you go to the Add-Ins tab, you’ll see that there are no external commands yet; that’s exactly what we’re going to create now.
2. The Architecture of an Addin: DLL and .addin Files
To develop addins for Revit, it is essential to understand that we always need to generate two different files for everything to work:
- The DLL (Dynamic Link Library) file: This is the addin itself, meaning our source code after it has been programmed and compiled.
- The manifest (.addin) file: This is a plain text file that acts as a roadmap. It contains no programming logic, but it tells Revit which addin to load, what it is called, and the exact path on the hard drive where the DLL file is located.
3. Setting Up the Project in Visual Studio
The first step is to structure our development environment:
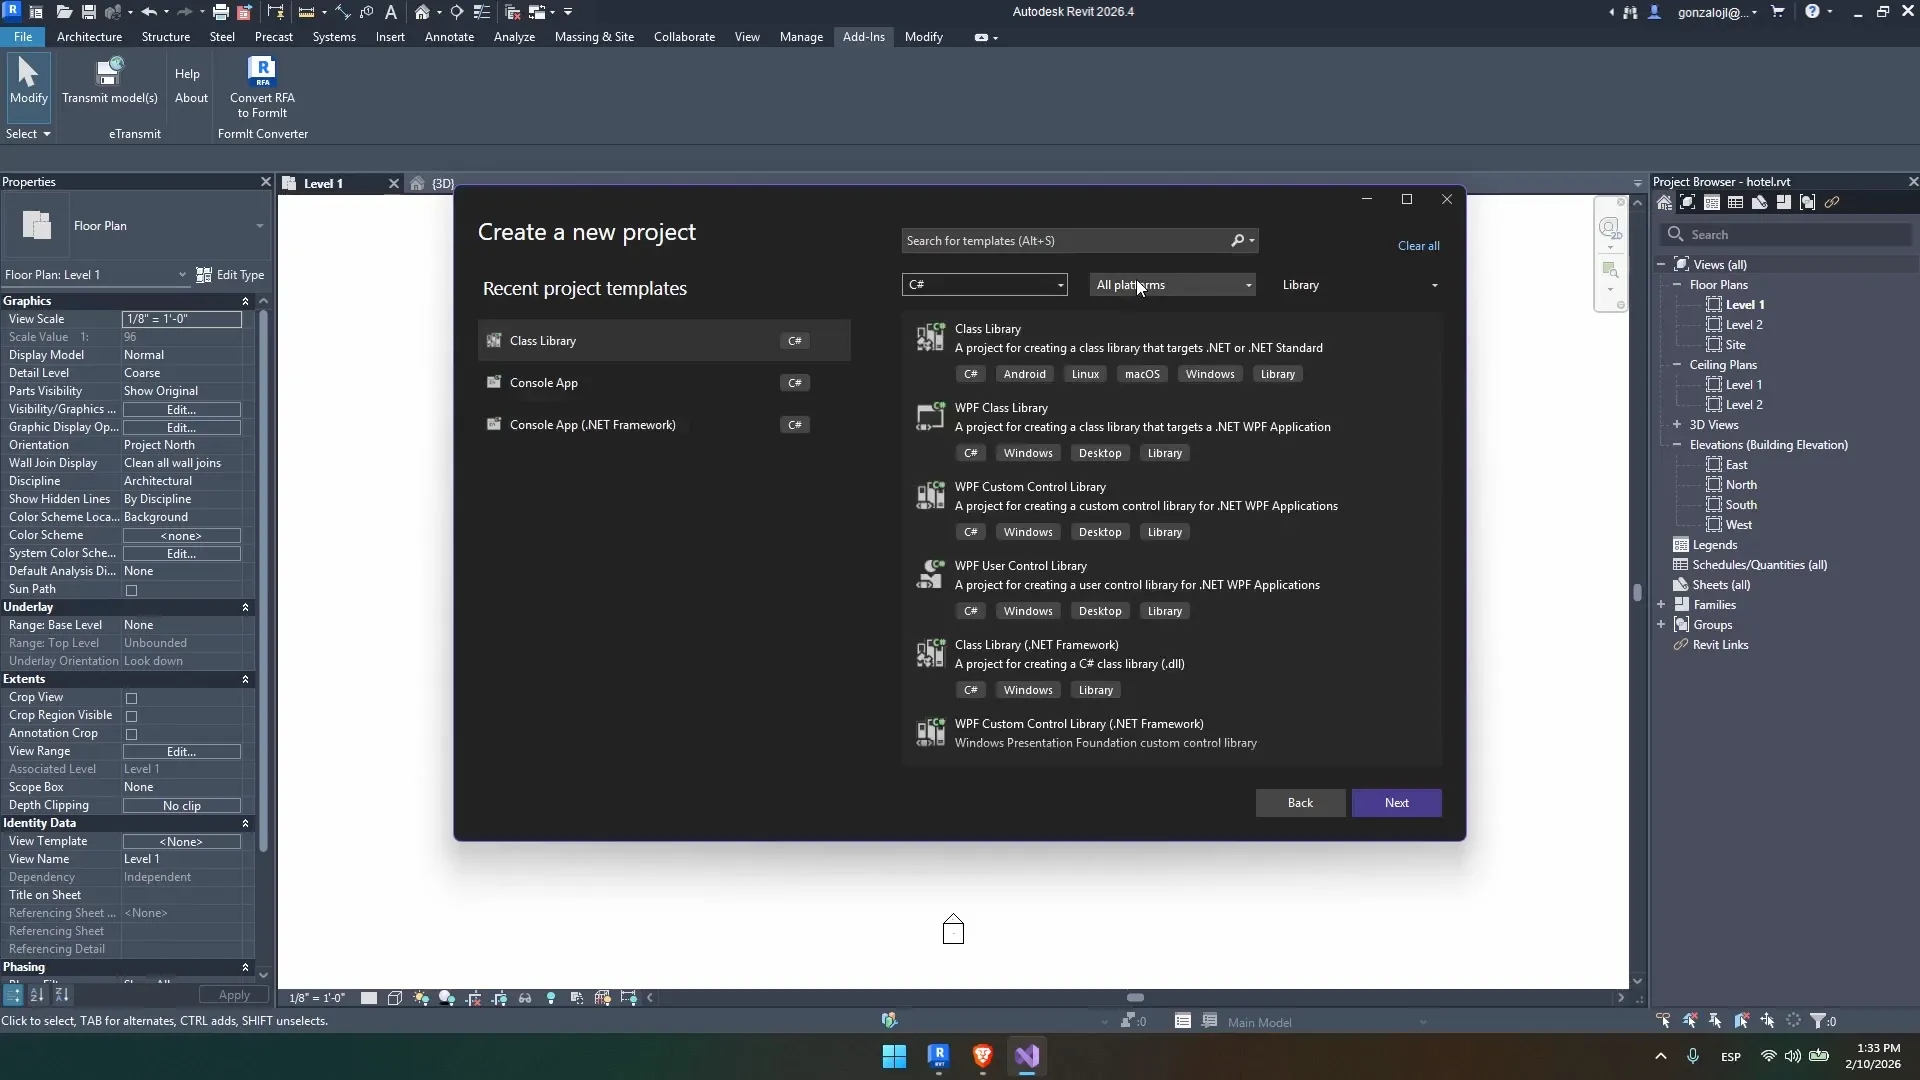
- Open Visual Studio and click Create New Project.
- Use the filters at the top to speed up the search: select the C# language, the All Platforms platform, and the Library project type.
- From the resulting options, select Class Library and click Next.
- Project name: To follow along with Autodesk’s tutorial, we’ll name it exactly:
Lab1PlaceGroup. - Location: Choose the path you prefer (for example, a folder called
teston the Desktop). Make sure to check the option to place the solution and project in the same directory. - Framework: Select .NET 8.0 (a stable version with long-term support, or LTS) and let Visual Studio generate the initial structure.
4. Linking the Revit API References
By default, Visual Studio doesn’t know what Revit is. We need to tell it where to find its libraries so that it can recognise the commands:
- In the Solution Explorer, right-click Dependencies and select Add Project Reference….
- Click Browse and navigate to the root folder where Revit is installed on your computer.
- Once there, find and add these two essential DLL files:
RevitAPI.dll: Contains the core logic, database, and internal engine of Revit.RevitAPIUI.dll: Contains everything related to the user interface and visual interaction.
Crucial Step: Disable Copy Local
Once both references have been added, select them in the Solution Explorer and open their Properties panel (right-click -> Properties). Find the Copy Local parameter and change it to No (False).
Why? Revit already includes and loads these libraries natively. If we leave the option set to “Yes”, Visual Studio will duplicate these large files inside our addin folder, which can cause loading conflicts in Revit and unnecessarily increase the file size.
5. Writing Code and Compiling
With the environment configured, we can now add the code. Autodesk’s web documentation provides the complete code block ready to use. Although during the learning stages it is recommended to type it out line by line, for this first general workflow you can simply copy and paste it, replacing the contents of your main class.
For a detailed explanation of the code, see Part 2.
Once saved, go to the top menu in Visual Studio: Build ➔ Build Solution. The program will process the code and generate your Lab1PlaceGroup.dll library file.
How to Clean Up Compilation Warnings
After compiling, you may see some warnings in the error list. They do not prevent the addin from working, but to keep the project clean, we will make two adjustments:
- Go to the Project Properties and, under the General tab, change the Platform Target to x64.
- A little further down, in the Suppress specific warnings field, enter the code:
MSB3277. - Build the solution again and you will see that the warnings have disappeared completely.
6. Creating the Manifest (.addin) with Notepad
Now we are missing the roadmap that Revit will read when it starts. To create it:
- Open Windows Notepad.
- Copy the example XML code provided in Autodesk’s tutorial.
- Important modification: Locate the line labelled
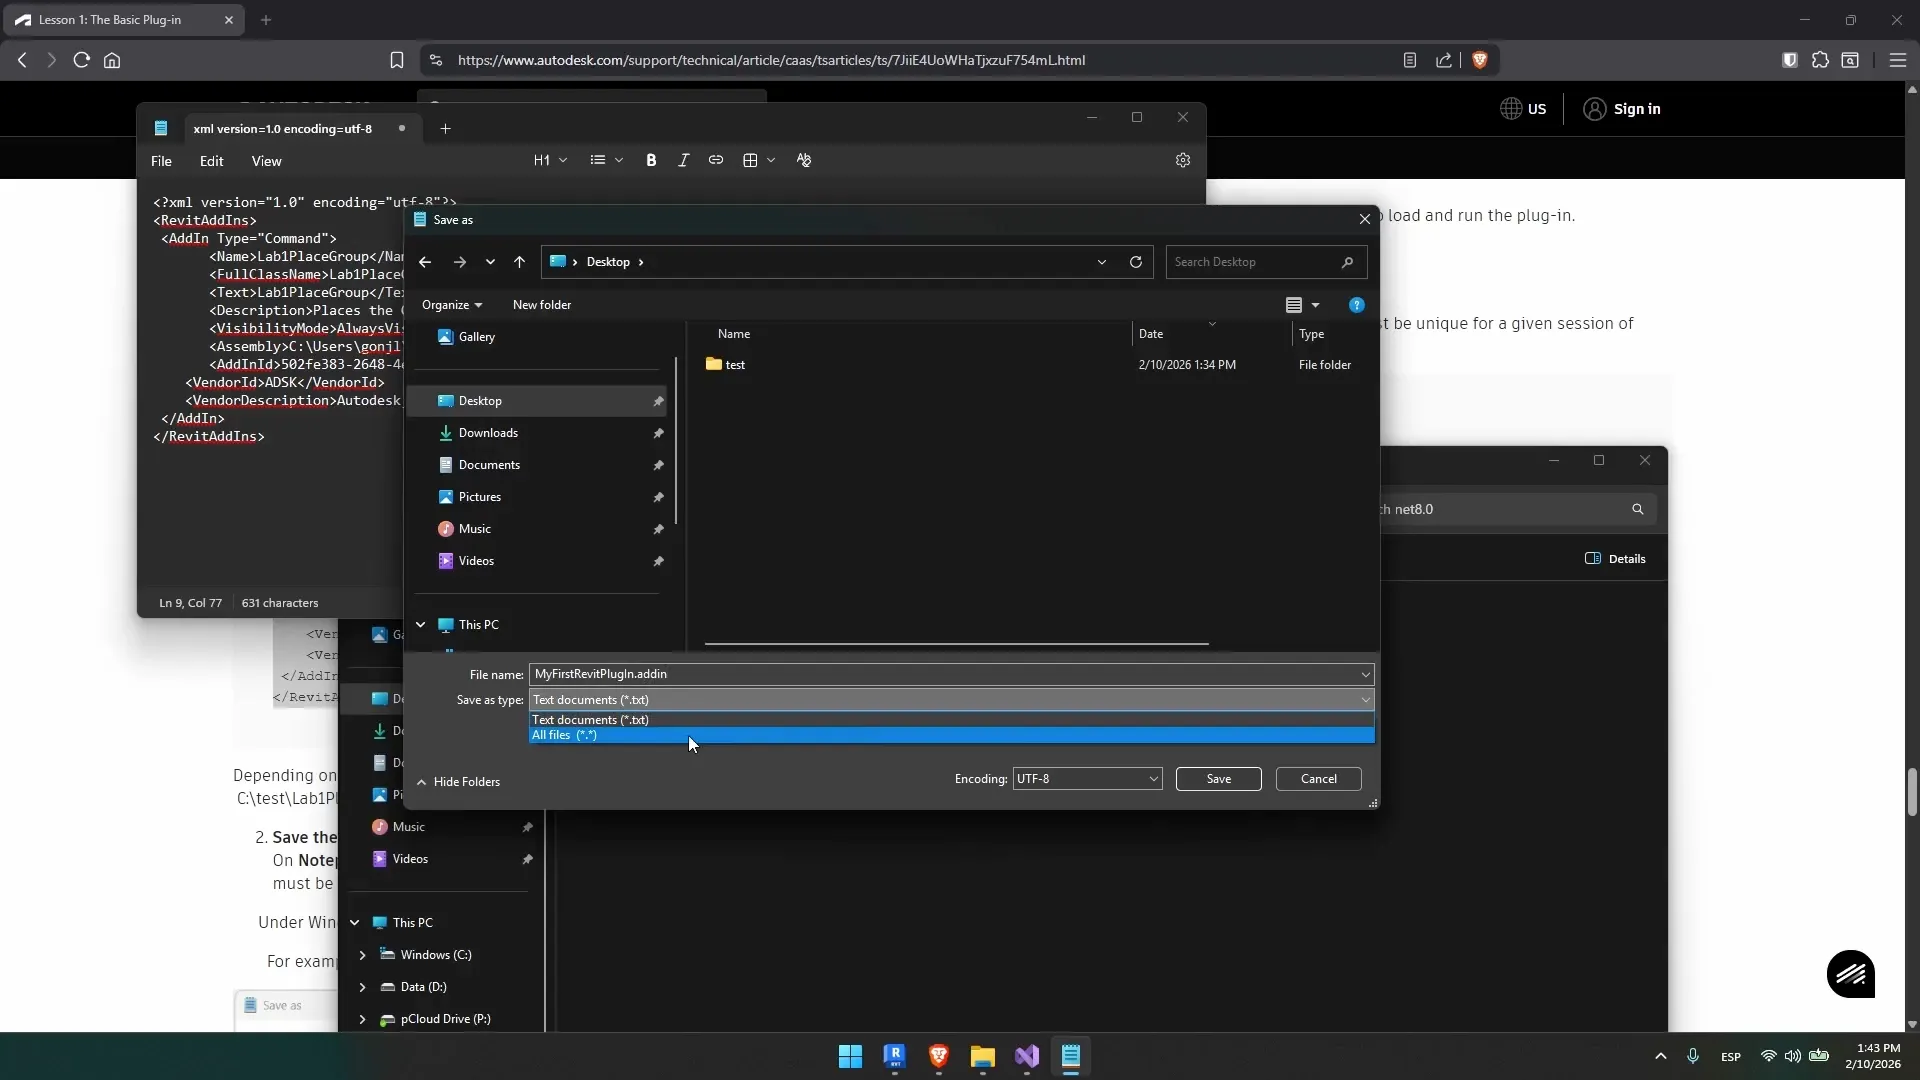
<Assembly>...</Assembly>. You will see that the path to the example DLL file does not match yours. You must replace it with the exact path on your hard drive where Visual Studio has just compiled your project (following our example, inside thetestfolder on the Desktop, navigating until you reach the.dllfile).<Assembly>C:\Users\YourName\Desktop\test\Lab1PlaceGroup\bin\Debug\net8.0\Lab1PlaceGroup.dll</Assembly> - To save it correctly: Go to File ➔ Save As, name it
MyFirstRevitPlugIn.addin, and, crucially, change the Save as type dropdown from.txttoAll Files (*.*).
7. Installing the Addin and Validating it in Revit
For Revit to detect the manifest, you need to move the .addin file you just saved to the system addins folder.
The exact path depends on your version of Revit, but it follows this structure: C:\ProgramData\Autodesk\Revit\Addins\[Your_Version_Year]\ (for example, 2025).
Important note: The
ProgramDatafolder is hidden by default in Windows. You will need to go to the File Explorer display options and enable the “Show hidden files, folders, and drives” option to access it.
As soon as you paste the file into that folder, if you go back to Revit you will see the External Commands button magically appear in the corner of the Add-Ins tab, with the addin ready to use.
Conclusion and Next Steps
If you run the addin inside the hotel model, you will be able to select a group of elements (for example, a set of furniture) and dynamically clone it by clicking anywhere else in the project.
Although from a professional perspective this tool may seem simple, the real goal of this lesson was to master the complete workflow: create the solution, link the APIs, compile the DLL binary, structure the manifest, and successfully get Revit to recognise it.
With this solid foundation in place, we can start adding more complexity. Currently, the addin allows you to select things that are not groups, which causes errors. In Part 2 we go through the code line by line: namespaces, the Execute() method, selection, casting and transactions, so you understand what each part does before modifying it.